I have never been pregnant, but I have been around hundreds of pregnant women. These stories always amaze me.
On Tuesday a Massachusetts woman learned she was nine months pregnant ONE hour before she gave birth to her daughter. She went to the hospital complaining of stomach pains only to find out she was about to have a newborn baby!
If you scour the internet you will find hundreds of stories like hers. I think there is (was) even a television show about this? The pregnant women I have know pretty much left no doubt that they were pregnant, as in they looked like they swallowed a basketball! So I find it interesting when a mom can be pregnant and not know it.
"Quite simply, [women] do not know they're pregnant because they have no symptoms -- no weight gain, no nausea, and little to no abdominal swelling. They may still have their periods, or have always had irregular periods," scientist Jena Pincott wrote in a HuffPost blog in 2011. "If they have symptoms, they're so subtle as to be easily mistaken for something else. Indigestion, perhaps."
Makes sense if your body hides it well, and you don't have any pregnancy symptoms, but can you imagine the surprise? You go in for back pain, stomach pain, and find out that you will be taking home a newborn in a few days!! Most families spend months prepping for a new baby. Finding the perfect nursery items, picking out baby clothes, choosing a name. How would you like to make all of those decisions AFTER bringing home a newborn?
Here's to Katie, and all the other mommas who don't have time to prepare and are surprised by a baby. We wish you all the best and hope you have fun cuddling with your new squish!
http://www.huffingtonpost.com/2015/01/09/massachusetts-woman-pregnant_n_6443264.html?ncid=fcbklnkushpmg00000037
Friday, January 9, 2015
Thursday, January 8, 2015
Adorable & hilarious "Interview with an Infant".
I am being very lazy this evening. All the kiddos went home and I have a house to clean, dishes to do, laundry to finish, and Christmas items still needing to be put away!
Instead I am wasting time on Instagram (follow me at "iamactuallythenanny"), Facebook (I Am Actually The Nanny), & Twitter (@20kidtips). I need to do a couple of errands & figure out diner.......instead I am curled up on the couch, snuggled up in my new blanket enjoying the silence and wasting time on social media.
At least I found this!
You're welcome. Good night.
Directed Snowman Art Project.
My sister is a Kindergarten teacher at a small private school. She has a class of 18 adorable little munchkins.......I could, possibly, be slightly partial, since I know most of the kids personally.
Her class is also doing a snowman unit this month. Here is the cute art project her students did yesterday.
This project was originally from Art Projects for Kids, but my sister found it on Learning Lessons with Mrs. Labrasciano's blog.


Her class is also doing a snowman unit this month. Here is the cute art project her students did yesterday.
This project was originally from Art Projects for Kids, but my sister found it on Learning Lessons with Mrs. Labrasciano's blog.
Original photo from Art Projects for Kids
Monday was the first day back from a two week break which is a long time when you are in kindergarten. Monday was spent going over the school rules, and sharing stories of "What did you get for Christmas?"
Tuesday we dived right back into things and started working on our snowman unit. This was our project from Wednesday. We did a Directed Art Project today and they all turned out so adorable!
First we drew our snowmen with pencil, following the step by step directions from Art Projects for Kids.
Once we had completed the steps using a pencil, the kids went back over their lines with a black permanent marker.
Then we started to color the background, we used water colors for this project.
Each one turned out so adorable, and yet so different.
Here they are all together and hanging in our classroom. They turned out so cute!!
The kids did a great job and had so much fun with this project.
Great way to start off the new year in our Kindergarten classroom!
Wednesday, January 7, 2015
Snowman Fun!
We like to pretend it's winter here in San Diego. It did drop into the 30's overnight last week and was "cold" during the day (mid 50's.) This week we are back up into the high 70's - currently it is 77 according to weather.com.
Yes. 77 degrees in January. Yes, I know most of you are not wearing shorts and flip-flops today. I am sorry. We have to pretend it's cold during winter so we do lots of "snow" crafts and projects. It is as close as we get!!
This month we are doing snowman activities and crafts. Today was our first day after the holidays with everyone here, so today was our first project.
I first saw this snowman craft project from Craftymorning.com and quickly added it to our "to-do" list! Items I already had around the house.

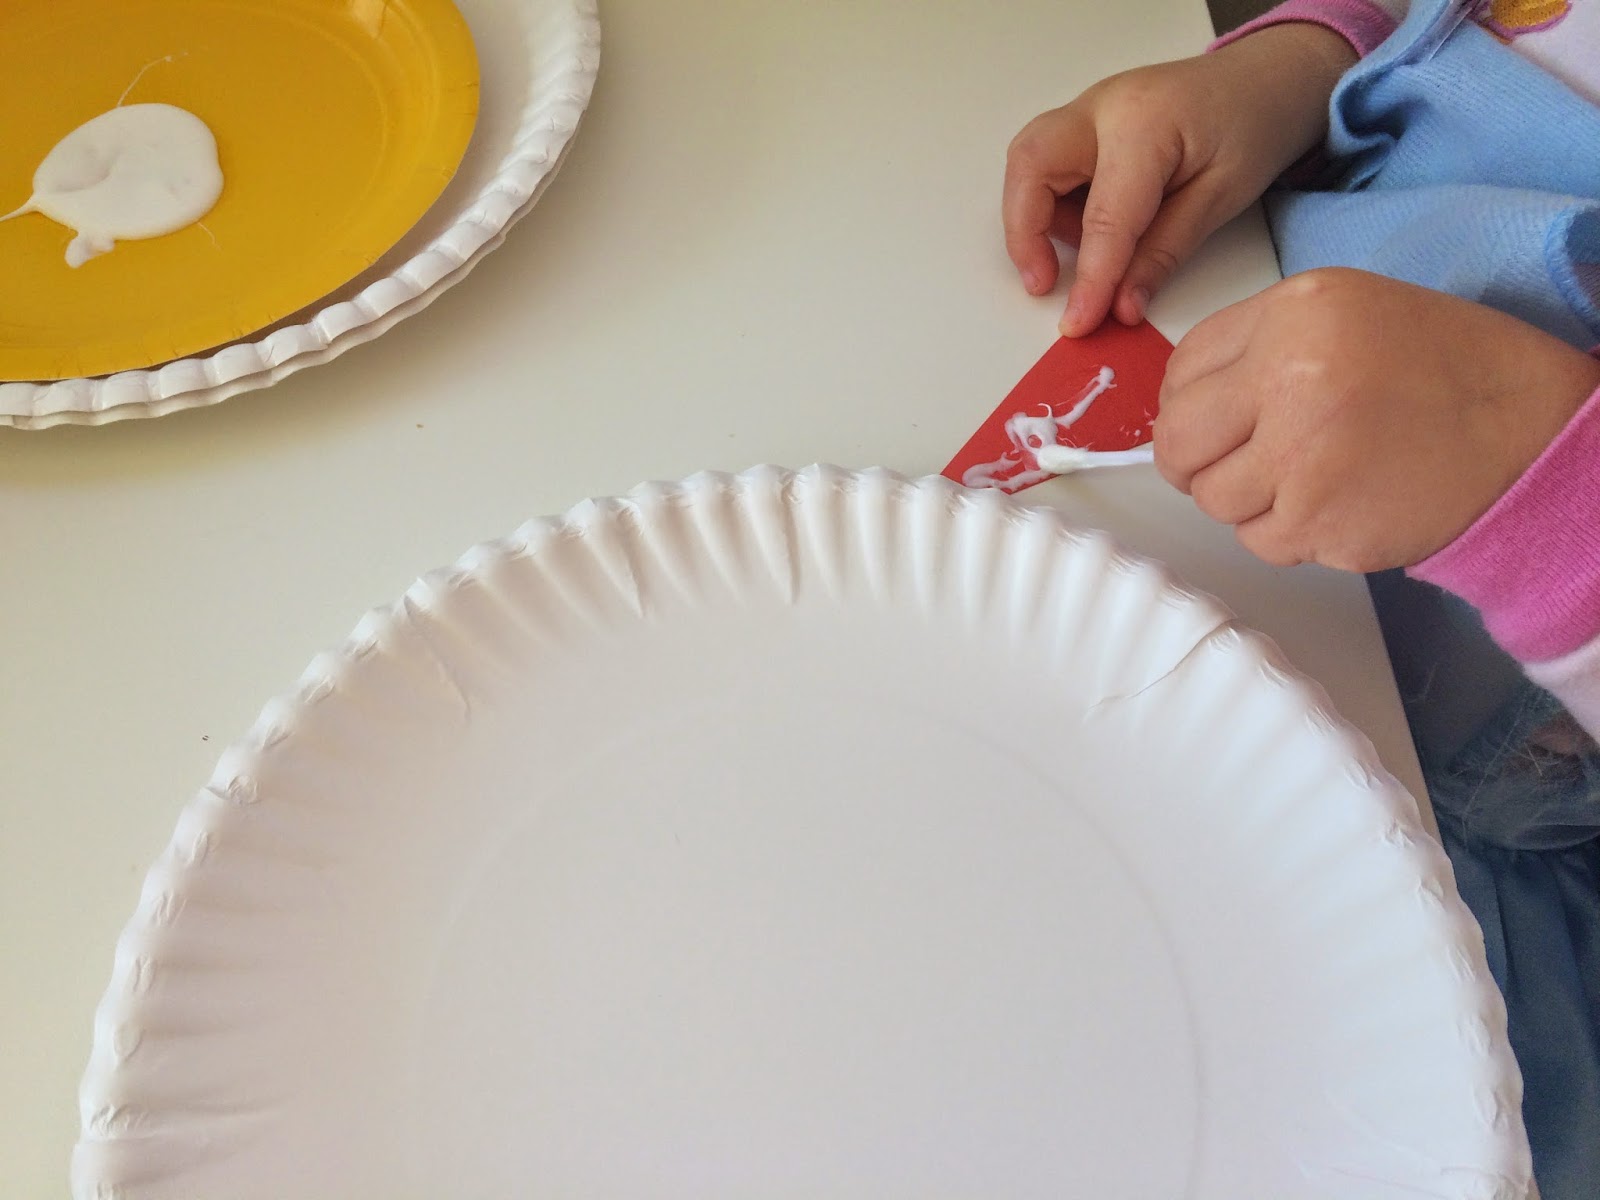
I wasn't happy when I realized that I was out of glue sticks.... how did that happen? So I brought out the Tacky Glue, which I prefer over regular white glue since it is so much thicker and holds stronger, faster. A small paper plate and two Q-tips made this toddler friendly.


Yes. 77 degrees in January. Yes, I know most of you are not wearing shorts and flip-flops today. I am sorry. We have to pretend it's cold during winter so we do lots of "snow" crafts and projects. It is as close as we get!!
This month we are doing snowman activities and crafts. Today was our first day after the holidays with everyone here, so today was our first project.
I first saw this snowman craft project from Craftymorning.com and quickly added it to our "to-do" list! Items I already had around the house.
I wasn't happy when I realized that I was out of glue sticks.... how did that happen? So I brought out the Tacky Glue, which I prefer over regular white glue since it is so much thicker and holds stronger, faster. A small paper plate and two Q-tips made this toddler friendly.
I cut out two orange triangle carrot noses, and four black circles for eyes and let the girls put glue on the backs of them .
They did a great job of figuring out where they should go on the plate.
This is Oldest's completed face. Two black eyes, one orange carrot nose, and one pink "smile" for a mouth. Pink because, well, pink it their FAVORITE color!
Next I cut out three small black "buttons", two black boots, and two pink mittens. I just free handed the boots and mittens, but you could easily google and print out something to trace if you want something less abstract.
At this point the glue started to go everywhere because Middle really liked using the Q-tips. She will enjoy the painting project I have lined up for later this week where we will paint with Q-tips.
Ta-da!! We finished, and they look ADORABLE! So sweet and the girls are VERY, VERY excited about their "NO-MANS".
Really this is a very easy, simple craft project that took very little time - and doable even with littles underfoot. Be on the lookout for a few more snowmen projects this week - Oldest couldn't be more excited for this week!!
Thursday, January 1, 2015
New Years Cookies
I know, I know. Everyone is all sugared out from a never ending stream of holiday goodies and treats over the past month. Buuuuuuut I got to spend some time with one of my best friends last night and we - for fun - went to a kitchen/baking store. We spent over an hour and a half browsing each aisle and checking out every item on the shelves! I found these awesome number cookie cutters. I have been looking for the perfect set of number cookie cutters, so Merry Christmas to me!
My sister made about 100 Christmas cookies at my house, just a week ago, and found a great recipe from the Blog 'Love Grows Wild'. Our resident "Cookie Snob/Expert" Cody, really liked the flavor, texture and how they stayed soft but didn't break easily. I didn't have any almond extract so I used 1 drop of lemon essential oil instead. I also didn't read the directions about rolling it out before putting it in the fridge.....oops! So it went into the fridge in a lump, covered in saran wrap. It worked just fine this way. Apparently I can't read directions all the way to the end, ha!
Oldest helped me add the ingredients with my new copper measuring cups that were in my Christmas stocking this year. (Thanks Sister!)
(They're so new I haven't even removed the price tag yet!)
We creamed 1 1/4cups organic sugar with 1cup organic dutch butter.
Then 1 1/2 teaspoon of vanilla went in next.
Next went in 1 egg, 1 drop of lemon essential oil (from Spark Naturals) 1/4 teaspoon of salt, 1 1/2 teaspoons of baking powder. Then 3 cups of flour.
Then into the fridge for about 3 hours (lunch time and go home time meant I didn't have time to get back to it for a while.)
Wrapped in plastic wrap chilling in the fridge.
For some reason I do not have a rolling pin - even though I used to own three?? So a glass jar works well as a stand in "rolling pin".
Supplies - Sur La Table baking mat, my "rolling pin",
cookie cutters, and a sharp edged spatula.
Ready to go in the oven! 350 degrees for 8-10 minutes, or until the tops are no longer shiny and the edges have just a HINT of brown.
In my oven 9 minutes was just perfect!
Cooling off
There were only three casualties of cookies breaking. Not bad I thought!
I will frost them tomorrow and package them for delivery to the neighbors.
I made it to 10:45pm but all I want to do is close my eyes, so I am going to go crawl into my cozy bed and wake up in 2015.
HAPPY NEW YEARS to you & your family!! Many wishes for a year full of strong choices, bravery, love and adventure.
Subscribe to:
Posts (Atom)